macOS15 min readMay 30, 2026

Mastering the Apple Desktop Ecosystem for Peak Productivity

The Apple Desktop Ecosystem provides a powerful and integrated experience for macOS users. By understanding and utilizing its core components, you can significantly enhance your productivity and streamline your workflow across all your Apple devices. This article will guide you through maximizing its potential.

Mastering the Apple Desktop Ecosystem for Peak Productivity

Introduction to the Apple Desktop Ecosystem

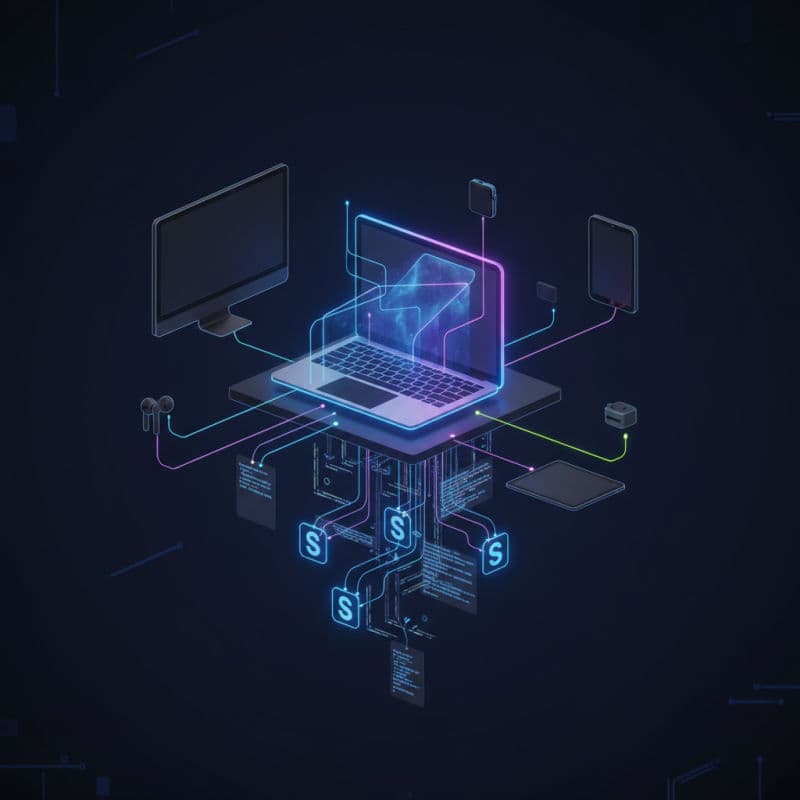
The Apple Desktop Ecosystem is more than just a collection of apps; it's an integrated environment designed to empower your workflow. At its heart lies macOS, Apple's robust and user-friendly operating system for Macs, which acts as the central hub for your desktop experience. But the ecosystem extends far beyond the Mac itself, seamlessly connecting with your iPhone, iPad, Apple Watch, and even Apple TV through powerful features like Handoff, Universal Clipboard, and Sidecar.

For developers, the Apple Desktop Ecosystem offers unparalleled tools and services. Xcode, Apple's integrated development environment, is a prime example, providing everything you need to build applications for all Apple platforms. Coupled with command-line tools, robust Unix underpinnings, and a thriving open-source community, macOS is a formidable platform for any development task. Understanding how these components work together is crucial for maximizing your efficiency and crafting high-quality applications.

This article will explore the core pillars of the Apple Desktop Ecosystem, from fundamental macOS features to advanced Continuity functions and essential developer tools. You'll learn how to leverage these capabilities to create a fluid, efficient, and enjoyable computing experience.

macOS Fundamentals: Core Features for Every User

macOS provides a rich set of features that form the backbone of the Apple Desktop Ecosystem. Understanding these fundamentals is key to building a productive workflow.

Finder: At the core of macOS file management is Finder. It's not just a file browser; it deeply integrates with iCloud Drive, network shares, and external storage. You can use Finder tags for effortless organization, Smart Folders for dynamic content grouping, and Quick Look for instant previews without opening files.

Spotlight: This powerful search utility (accessible via Cmd + Space) goes beyond finding files. Spotlight can launch apps, perform calculations, convert units, search the web, and even find emails or documents based on their content.

Mission Control & Spaces: Mission Control (Control + Up Arrow) gives you an overview of all open windows, desktop spaces, and full-screen apps. "Spaces" allow you to create multiple virtual desktops, each with its own set of applications and windows, helping you categorize and manage your work more effectively. You can easily switch between spaces using Control + Right/Left Arrow.

System Settings (or System Preferences in older macOS): This is where you customize your Mac. From display settings and network configurations to privacy controls and keyboard shortcuts, mastering System Settings allows you to tailor your Mac experience precisely to your needs. Always check for updates here to ensure you're running the latest and most secure version of macOS.

Automation with Shortcuts (macOS Monterey and later): The Shortcuts app, previously exclusive to iOS, brings powerful automation to your Mac. You can create custom workflows that automate repetitive tasks, integrate with other apps, and even run on specific triggers. This is a game-changer for speeding up your daily routines.

For example, to quickly create a shortcut that resizes an image, you would open the Shortcuts app, create a new shortcut, add the 'Get Image from Input' action, followed by 'Resize Image', and then 'Save File'. This can be triggered from the Services menu in Finder.

swift
// Example: Automating a common task with a macOS Shortcut (Conceptual Swift representation)
// In reality, this would be built in the Shortcuts app with its visual editor.
// This Swift code illustrates the logic a Shortcut might perform.

import Foundation
import AppKit // For NSImage and related classes

func resizeImage(atPath originalPath: String, to outputFolder: String, maxWidth: CGFloat) throws {
    guard let originalImage = NSImage(contentsOfFile: originalPath) else {
        throw NSError(domain: "ImageError", code: 1, userInfo: [NSLocalizedDescriptionKey: "Could not load image."])
    }

    let aspectRatio = originalImage.size.width / originalImage.size.height
    let newWidth = min(maxWidth, originalImage.size.width)
    let newHeight = newWidth / aspectRatio

    let targetSize = NSSize(width: newWidth, height: newHeight)
    let newImage = NSImage(size: targetSize)

    newImage.lockFocus()
    originalImage.draw(in: NSRect(origin: .zero, size: targetSize))
    newImage.unlockFocus()

    guard let tiffData = newImage.tiffRepresentation else {
        throw NSError(domain: "ImageError", code: 2, userInfo: [NSLocalizedDescriptionKey: "Could not get TIFF representation."])
    }
    guard let bitmapImageRep = NSBitmapImageRep(data: tiffData) else {
        throw NSError(domain: "ImageError", code: 3, userInfo: [NSLocalizedDescriptionKey: "Could not create bitmap representation."])
    }
    let properties: [NSBitmapImageRep.PropertyKey: Any] = [.compressionFactor: 1.0] // Maximum quality
    guard let pngData = bitmapImageRep.representation(using: .png, properties: properties) else {
        throw NSError(domain: "ImageError", code: 4, userInfo: [NSLocalizedDescriptionKey: "Could not convert to PNG data."])
    }

    let originalFileName = URL(fileURLWithPath: originalPath).deletingPathExtension().lastPathComponent
    let outputURL = URL(fileURLWithPath: outputFolder).appendingPathComponent("\(originalFileName)_resized.png")

    try pngData.write(to: outputURL)
    print("Image resized and saved to: \(outputURL.path)")
}

// How you *might* call this if it were a command-line tool or part of a larger app
/*
let inputPath = "/Users/youruser/Desktop/original.jpg"
let outputPath = "/Users/youruser/Desktop/resized_images"
let desiredWidth: CGFloat = 800

do {
    try resizeImage(atPath: inputPath, to: outputPath, maxWidth: desiredWidth)
} catch {
    print("Error resizing image: \(error.localizedDescription)")
}
*/

Continuity Features: Bridging Your Apple Devices

The true magic of the Apple Desktop Ecosystem lies in its Continuity features, which seamlessly connect your Mac with your iPhone, iPad, and other Apple devices. These features eliminate friction and create a unified experience, boosting your productivity.

Handoff: Start a task on one Apple device and seamlessly continue it on another. For example, begin drafting an email on your iPhone and instantly pick it up on your Mac, or browse a webpage on your iPad and open it on your Mac's Safari. Handoff works with Apple's native apps (Mail, Safari, Pages, Numbers, Keynote, Maps, Messages, Reminders) and many third-party apps that have adopted the feature. (Requires iOS 8/macOS Yosemite or later).

Universal Clipboard: Copy text, images, photos, and video from one Apple device and paste it directly onto another. This is incredibly powerful for transferring small pieces of information without needing to email or message yourself. (Requires iOS 10/macOS Sierra or later).

Sidecar: Extend your Mac's desktop to your iPad or use your iPad as a high-precision input device with Apple Pencil. This transforms your iPad into a secondary display, perfect for creative work, reference materials, or simply giving you more screen real estate. Sidecar can connect wirelessly or via a USB cable. (Requires iPadOS 13/macOS Catalina or later).

iPhone Cellular Calls/Continuity Camera: Make and receive iPhone calls directly on your Mac, iPad, or Apple Watch, even if your iPhone is in another room. Continuity Camera lets you use your iPhone (or iPad) to scan documents or take pictures from within a Mac app, with the content appearing instantly on your Mac. (Requires iOS 8/macOS Yosemite or later for calls; iOS 12/macOS Mojave or later for Continuity Camera).

Auto Unlock with Apple Watch: Unlock your Mac automatically when you're wearing an unlocked Apple Watch and are near your computer. No need to type your password! (Requires watchOS 3/macOS Sierra or later).

Universal Control (macOS Monterey 12.3 and later): Control multiple Macs and iPads with a single keyboard and mouse (or trackpad). You can effortlessly move your cursor between devices, type on any of them, and even drag and drop files between them. This feature is revolutionary for multi-device setups.

Implementing these Continuity features requires that all your devices are signed into the same Apple ID, have Bluetooth and Wi-Fi enabled, and in some cases, are connected to the same Wi-Fi network. By maximizing these connections, you create a truly fluid and interconnected workspace.

swift
// Swift code demonstrating basic Handoff setup in an app
// (This is a simplified example; actual implementation is more extensive)

import Foundation
import ActivityKit // For user activities
import AppKit // For NSUserActivity

class DocumentEditorViewModel: ObservableObject {
    @Published var documentContent: String = "" {
        didSet {
            updateUserActivity()
        }
    }
    
    private var userActivity: NSUserActivity?
    private let activityType = "com.yourcompany.yourapp.editingDocument"
    
    init() {
        setupUserActivity()
    }
    
    private func setupUserActivity() {
        userActivity = NSUserActivity(activityType: activityType)
        userActivity?.title = "Editing Document"
        userActivity?.userInfo = ["documentIdentifier": "uniqueDocID-123", "documentTitle": "My Great Novel"]
        userActivity?.needsSave = true
        userActivity?.isEligibleForHandoff = true
        userActivity?.becomeCurrent()
        
        // Additional relevant data for Handoff (e.g., current scroll position)
        userActivity?.addUserInfoEntries(from: ["scrollOffset": 0.5])
    }
    
    private func updateUserActivity() {
        // Update user activity state with current document content (or a reference to it)
        // For large content, you'd typically pass an identifier and load on the receiving device.
        userActivity?.addUserInfoEntries(from: ["currentContentSnippet": String(documentContent.prefix(100))])
    }
    
    func invalidateActivity() {
        userActivity?.invalidate()
    }
    
    // When your app is launched via Handoff on another device
    func restoreUserActivityState(_ activity: NSUserActivity) {
        guard activity.activityType == activityType else { return }
        if let docID = activity.userInfo?["documentIdentifier"] as? String {
            print("Handoff received for document: \(docID)")
            // Load document content based on docID
            // For example: self.documentContent = loadDocument(id: docID)
        }
        if let snippet = activity.userInfo?["currentContentSnippet"] as? String {
            print("Content snippet: \(snippet)")
        }
    }
}

// Example usage in an `App` or `SceneDelegate` (for UIKit/AppKit apps)
/*
// In your App struct (SwiftUI)
@main
struct MyApp: App {
    @StateObject private var editorViewModel = DocumentEditorViewModel()

    var body: some Scene {
        WindowGroup {
            ContentView(viewModel: editorViewModel)
        }
        .onContinueUserActivity(editorViewModel.activityType) { activity in
            editorViewModel.restoreUserActivityState(activity)
        }
    }
}

// Or if you were in an AppKit AppDelegate:
func application(_ application: NSApplication, willContinueUserActivityWithType userActivityType: String) -> Bool {
    // Decide if your app can handle this activity type
    return userActivityType == "com.yourcompany.yourapp.editingDocument"
}

func application(_ application: NSApplication, continue userActivity: NSUserActivity, restorationHandler: @escaping ([NSUserActivityRestoring]) -> Void) -> Bool {
    // Handle the incoming user activity
    if userActivity.activityType == "com.yourcompany.yourapp.editingDocument" {
        let viewModel = DocumentEditorViewModel() // Or access your existing one
        viewModel.restoreUserActivityState(userActivity)
        restorationHandler([viewModel as! NSUserActivityRestoring]) // Pass controller/view model to restore state
        return true
    }
    return false
}
*/

Developer Tooling & Ecosystem for macOS

macOS is a powerful platform for developers, offering a rich set of tools and a developer-friendly environment. Whether you're building native Apple apps, web services, or working on cross-platform projects, the ecosystem provides robust support.

Xcode: Apple's integrated development environment (IDE) is essential for developing apps across iPhone, iPad, Mac, Apple Watch, and Apple TV. Xcode includes everything you need: a code editor, visual Interface Builder, debugger, instruments for performance analysis, and complete documentation. It supports Swift and Objective-C, and integrates seamlessly with Git for version control. (Requires macOS Catalina 10.15.4 or later for current versions of Xcode).

Swift & Objective-C: These are the primary languages for developing on Apple platforms. Swift, in particular, offers modern syntax, safety features, and excellent performance, making it highly attractive for new projects.

Homebrew: While not an Apple-exclusive tool, Homebrew is the de facto package manager for macOS, making it easy to install and manage command-line tools, utilities, and software that Apple doesn't provide by default. It's an indispensable tool for any developer on macOS.

Terminal & UNIX Underpinnings: macOS is built on a UNIX-based core, providing a powerful command-line interface (CLI) through Terminal. This allows developers to use a vast array of UNIX utilities, scripting languages (like Bash, Zsh, Python, Ruby), and development tools directly. This robust foundation makes macOS a favorite for many developers.

Simulator & TestFlight: Xcode provides robust simulators for testing your apps on various iPhone, iPad, Apple Watch, and Apple TV models directly on your Mac. For beta testing with real users, TestFlight (integrated with App Store Connect) allows you to distribute pre-release versions of your apps and gather feedback.

CloudKit & SwiftUI: For backend services, CloudKit offers a declarative way to store and retrieve data directly from Apple's iCloud infrastructure. SwiftUI, Apple's declarative UI framework, revolutionizes app development, allowing you to build UIs across all platforms with less code and enhanced productivity. (Requires macOS Catalina 10.15/iOS 13 or later for SwiftUI first generation; newer versions require more recent OS versions).

Mastering these tools and understanding how they integrate empowers you to build sophisticated and efficient applications, leveraging the full power of the Apple ecosystem. For example, using Swift Playgrounds on iPad for initial code exploration and then seamlessly transitioning to Xcode on Mac for full-scale development is a prime example of the ecosystem's power.

swift
// Swift code for a simple macOS app using SwiftUI
// This demonstrates basic UI and data binding in a native Apple Desktop app.

import SwiftUI

@main
struct MyMacApp: App {
    var body: some Scene {
        WindowGroup {
            ContentView()
                .frame(minWidth: 400, maxWidth: .infinity, minHeight: 300, maxHeight: .infinity)
        }
        .commands { // Customize menu commands
            CommandGroup(after: .appInfo) {
                Button("About My Mac App") {
                    NSApplication.shared.orderFrontStandardAboutPanel(options: [NSApplication.AboutPanelOptionKey.credits: NSAttributedString(string: "Developed with love on macOS.")])
                }
            }
        }
    }
}

struct ContentView: View {
    @State private var textInput: String = "Hello, Apple Ecosystem!"
    @State private var showSheet: Bool = false

    var body: some View {
        VStack {
            Text("Welcome to Your Mac App")
                .font(.largeTitle)
                .padding()

            TextField("Enter some text", text: $textInput)
                .textFieldStyle(RoundedBorderTextFieldStyle())
                .frame(maxWidth: 300)
                .padding(.bottom, 20)

            Button("Show Alert") {
                showSheet = true
            }
            .padding()

            Text("Current input: \(textInput)")
                .font(.headline)

            Spacer()
        }
        .padding()
        .sheet(isPresented: $showSheet) {
            AlertSheet(message: textInput)
        }
    }
}

struct AlertSheet: View {
    let message: String
    @Environment(\.dismiss) var dismiss // For dismissing the sheet

    var body: some View {
        VStack {
            Text("You entered:")
                .font(.title2)
            Text(message)
                .font(.body)
                .padding()
            Button("Close") {
                dismiss()
            }
        }
        .frame(width: 300, height: 150)
        .presentationCompact(".regular") // For newer macOS versions, makes sheets smaller
    }
}

struct ContentView_Previews: PreviewProvider {
    static var previews: some View {
        ContentView()
    }
}

Security and Privacy in the Apple Ecosystem

Security and privacy are fundamental pillars of the Apple Desktop Ecosystem, designed to protect your data and ensure your digital safety. Apple's approach integrates hardware and software to offer robust protection from the ground up.

Secure Enclave: Many modern Macs (those with Apple Silicon or T2 Security Chip) include a Secure Enclave coprocessor. This hardware component stores sensitive information like Touch ID (or Face ID on some iPhones/iPads) data encrypted and isolated from the main processor, making it extremely difficult for unauthorized access.

Gatekeeper and Notarization: macOS employs Gatekeeper to verify downloaded apps. By default, it only allows apps from the App Store and identified developers to run. Apple's notarization service scans submitted apps for malicious content before they are distributed, adding another layer of security.

System Integrity Protection (SIP): Introduced in macOS El Capitan, SIP prevents malware and even root users from modifying critical system files and folders, providing protection against system-level attacks.

Privacy Controls: macOS offers granular control over which applications can access your microphone, camera, location, photos, contacts, and other sensitive data. You can review and adjust these permissions in System Settings > Privacy & Security at any time.

FileVault: This feature encrypts the entire contents of your Mac's startup disk, providing strong protection for your data if your Mac is lost or stolen. It's highly recommended to enable FileVault.

App Transparency Tracking (ATT): While more prominent on iOS, ATT also influences how apps interact with your data on macOS by requiring apps to explicitly ask for your permission before tracking your activity across other companies' apps and websites.

For developers, adhering to best practices like sandboxing applications, requesting minimal necessary permissions, and properly handling user data is crucial. The ecosystem provides the tools and guidelines to build secure applications that respect user privacy. Always keep your macOS and apps updated to benefit from the latest security patches.

Optimizing Your Workflow with Ecosystem Integration

Beyond individual features, the true power of the Apple Desktop Ecosystem comes from weaving them into a seamless and optimized workflow. Here are strategies to maximize your productivity:

Unified Notifications: Manage all your notifications from Mac, iPhone, and iPad in one place. Focus Modes (macOS Monterey and later) allow you to customize which notifications appear at certain times or when using specific apps, reducing distractions.

iCloud Sync: Leverage iCloud Drive, iCloud Photos, iCloud Mail, Calendars, Reminders, and Notes to keep all your important data synchronized across all devices. This means your work is always up-to-date and accessible, regardless of which device you're using. Developers can use iCloud to sync app data using CloudKit or NSUbiquitousKeyValueStore.

Shared Password Management with iCloud Keychain: Securely store and sync your passwords, credit card information, and Wi-Fi network passwords across all your Apple devices. This makes logging into websites and apps effortless and secure.

Automating with Shortcuts and Automator: While Shortcuts is newer and more powerful (macOS Monterey+), Automator still offers robust capabilities for creating workflows, quick actions, and applications to automate repetitive tasks on your Mac. Combine them with AppleScript for deep system control.

Developer Benefits:

  • Simulator & Device Management: Easily deploy and debug apps on connected devices or simulators from Xcode. Handoff debugging between devices for complex scenarios.
  • Asset Management: Use Asset Catalogs in Xcode for unified image, color, and data asset management that scales across different resolutions and device types.
  • Version Control Integration: Xcode's built-in Git integration simplifies code management, branching, and merging for development teams.

By consciously integrating these features, you can eliminate mundane tasks, reduce context switching, and focus more on creative and productive work. For example, a developer might use Universal Control to drag a design asset from an iPad with a client's feedback directly into Xcode on their Mac, while simultaneously using Handoff to finish an email drafted on their iPhone. This level of integration transforms individual devices into a cohesive, powerful workstation.

swift
// Swift example: Observing iCloud Key-Value Store for settings sync
// This demonstrates syncing simple user preferences across devices via iCloud.

import Foundation

class UserSettings: ObservableObject {
    @Published var themePreference: String = "default" {
        didSet {
            // Update iCloud when preference changes locally
            NSUbiquitousKeyValueStore.default.set(themePreference, forKey: "themePreference")
            NSUbiquitousKeyValueStore.default.synchronize()
        }
    }

    init() {
        // Load initial preference from iCloud or local defaults
        if let storedTheme = NSUbiquitousKeyValueStore.default.string(forKey: "themePreference") {
            self.themePreference = storedTheme
        } else {
            // Fallback to a local default if nothing in iCloud
            self.themePreference = UserDefaults.standard.string(forKey: "themePreference") ?? "light"
        }

        // Register for iCloud Key-Value Store change notifications
        NotificationCenter.default.addObserver(self, 
                                               selector: #selector(iCloudStoreDidChange), 
                                               name: NSUbiquitousKeyValueStore.didChangeExternallyNotification, 
                                               object: NSUbiquitousKeyValueStore.default)
    }

    @objc private func iCloudStoreDidChange(notification: Notification) {
        // Handle changes coming from other devices via iCloud
        guard let userInfo = notification.userInfo else { return }
        
        // See what changed (types of changes) - optional for detailed handling
        // let changeReason = userInfo[NSUbiquitousKeyValueStoreChangeReasonKey] as? NSNumber
        // let changedKeys = userInfo[NSUbiquitousKeyValueStoreChangedKeysKey] as? [String]

        if let newTheme = NSUbiquitousKeyValueStore.default.string(forKey: "themePreference") {
            DispatchQueue.main.async {
                self.themePreference = newTheme
                print("iCloud theme preference updated to: \(newTheme)")
            }
        }
    }

    deinit {
        NotificationCenter.default.removeObserver(self,
                                                  name: NSUbiquitousKeyValueStore.didChangeExternallyNotification,
                                                  object: NSUbiquitousKeyValueStore.default)
    }
}

// Example of how you might use this class in a SwiftUI view or App delegate
/*
// In your App struct (SwiftUI)
@main
struct SettingsApp: App {
    @StateObject private var userSettings = UserSettings()

    var body: some Scene {
        WindowGroup {
            ContentView()
                .environmentObject(userSettings) // Make settings available to views
        }
    }
}

struct ContentView: View {
    @EnvironmentObject var userSettings: UserSettings

    var body: some View {
        VStack {
            Text("Current Theme: \(userSettings.themePreference)")
                .font(.title)
                .padding()

            Button("Toggle Theme") {
                userSettings.themePreference = (userSettings.themePreference == "light" ? "dark" : "light")
            }
            .padding()
        }
    }
}
*/

Frequently Asked Questions

What is the Apple Desktop Ecosystem?
The Apple Desktop Ecosystem refers to the integrated network of Apple hardware (Mac, iPhone, iPad, Apple Watch) and software (macOS, iOS, watchOS, and continuity features like Handoff, Universal Clipboard, and iCloud) designed to work together seamlessly. It aims to provide a consistent and powerful user experience across all devices, enhancing productivity and connectivity.
What are the most important Continuity features for productivity?
Key Continuity features for productivity include Handoff (to continue tasks across devices), Universal Clipboard (copy/paste between devices), Sidecar (using iPad as a second Mac display), Universal Control (controlling multiple Macs/iPads with one keyboard/mouse), and iCloud sync (keeping data consistent across all devices). These features reduce friction and allow for fluid transitions between tasks and devices.
Do I need an iPhone or iPad to fully benefit from the Apple Desktop Ecosystem?
While a Mac alone offers a powerful desktop experience, having an iPhone or iPad significantly enhances the ecosystem's benefits. Continuity features are designed to bridge these devices, unlocking advanced workflows like Handoff, Sidecar, and Universal Control, which truly differentiate the Apple ecosystem from other platforms.
How do developers utilize the Apple Desktop Ecosystem?
Developers heavily rely on the Apple Desktop Ecosystem through Xcode for building apps, macOS's UNIX foundation for command-line tools, and Continuity features for debugging and testing across multiple devices. Tools like Homebrew, SwiftUI for multi-platform UI, and CloudKit for backend services further establish macOS as a robust development environment.
What macOS versions are required for the latest Continuity features?
Newer Continuity features generally require more recent macOS and iOS/iPadOS versions. For example, Universal Control requires macOS Monterey 12.3 (and iPadOS 15.4 or later), while Sidecar needs macOS Catalina 10.15 (and iPadOS 13 or later). Handoff and Universal Clipboard have been around since macOS Yosemite/iOS 8 and macOS Sierra/iOS 10, respectively. Always check Apple's official documentation for specific version compatibility.
Is the Apple Desktop Ecosystem secure?
Yes, security and privacy are core tenets of the Apple Desktop Ecosystem. Features like the Secure Enclave, System Integrity Protection (SIP), Gatekeeper, FileVault encryption, and granular privacy controls within System Settings work together to protect your data and device from unauthorized access and malware. Regularly updating your macOS and apps is crucial for maintaining security.
#macOS#Apple Ecosystem#Productivity#Continuity#Workflow#Developers