Mastering NSView: The Foundation of macOS UI Development
NSView is the fundamental class for drawing, event handling, and managing the visual hierarchy of your macOS applications. Understanding NSView is crucial for building custom user interfaces and delivering a native Mac experience. This article explores its core functionalities and advanced techniques.
Introduction to NSView: The Canvas of macOS
At the heart of every visual element in a macOS application lies NSView. Whether it's a button, a text field, or a complex custom control, it's ultimately built upon or contained within an NSView instance. Think of NSView as the canvas where all your drawing and user interactions happen.
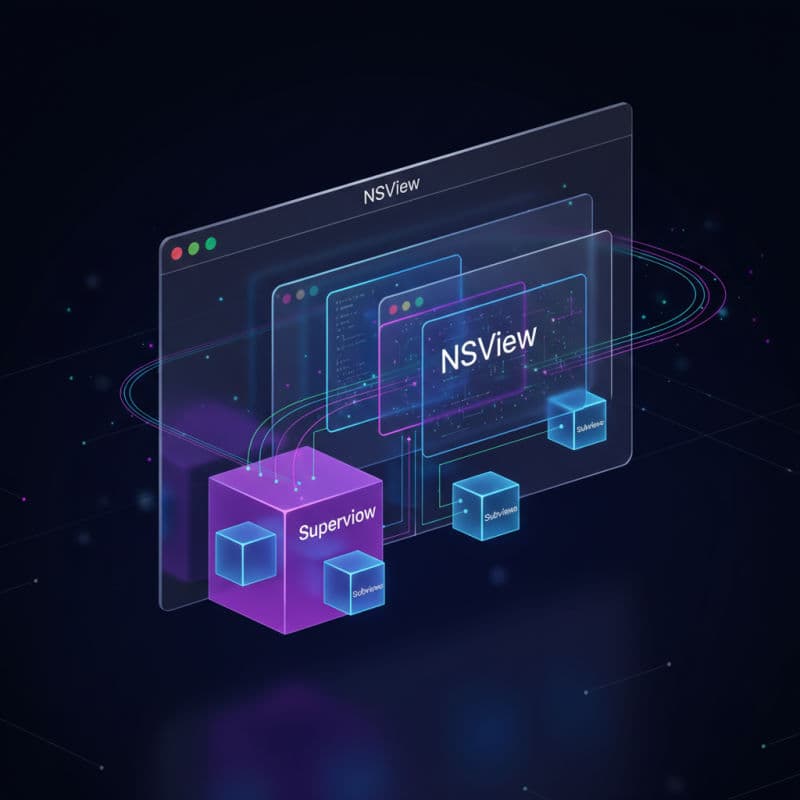
NSView objects form a view hierarchy, a tree-like structure where views can contain other views. The top-level view in a window is called the content view, and it's an instance of NSView (or a subclass). All other views are subviews of this content view or other views within the hierarchy. This hierarchy dictates drawing order, event propagation, and layout.
Understanding NSView is essential for any macOS developer looking to move beyond standard controls and create unique, high-performance user interfaces. It provides the mechanisms for custom drawing, responding to mouse and keyboard events, managing focus, and participating in the layout system. While SwiftUI has emerged as a powerful declarative UI framework for Apple platforms, many existing macOS applications and certain custom UI demands still rely heavily on AppKit and NSView.
Creating and Adding NSViews Programmatically
You can create NSView instances programmatically and add them to your view hierarchy. This is a common approach for building dynamic interfaces or custom components that don't fit into Interface Builder's standard palette. When creating a view, you typically initialize it with a frame rectangle that defines its position and size within its superview's coordinate system.
After creating a view, you add it to its parent view using the addSubview(_:) method. It's good practice to set constraints or use autoresizing masks to manage the view's layout, ensuring it behaves correctly when its superview resizes. For simpler layouts, autoresizing masks (e.g., .widthSizable, .heightSizable) can provide basic flexibility, but for complex adaptive UIs, Auto Layout constraints are the preferred modern approach.
This example demonstrates creating a simple NSView subclass, instantiating it, and adding it to a window's content view. Remember to correctly manage the view's frame or use Auto Layout for proper positioning and sizing.
Custom Drawing with the draw(_:) Method
One of NSView's most powerful capabilities is custom drawing. You achieve this by overriding the draw(_:) method in your NSView subclass. This method is invoked by the system when a portion of the view needs to be redrawn (e.g., when it becomes visible, is resized, or explicitly marked as needing display).
Inside draw(_:), you use AppKit's powerful 2D graphics APIs, primarily based on Core Graphics, to render content. You can draw shapes (NSBezierPath), text (NSAttributedString), images (NSImage), and apply transformations. The dirtyRect parameter tells you which portion of the view's bounds needs redrawing, allowing for optimized drawing if only a small area has changed.
Important Considerations:
- Performance:
draw(_:)can be called frequently. Draw only what's necessary and avoid complex calculations inside this method. Cache expensive pre-computations if possible. - Core Graphics Context: When
draw(_:)is called, AppKit sets up the appropriate Core Graphics context. You don't typically need to create one yourself. All AppKit drawing methods implicitly draw into this context. setNeedsDisplay(_:): To force a redraw of a view or a portion of it, callsetNeedsDisplay(_:)orsetNeedsDisplayIn(_:). The actual drawing happens during the next update cycle, not immediately.wantsLayer: For more advanced drawing (e.g., using Core Animation layers directly), setwantsLayer = true. This backs your view with aCALayer, enabling powerful animation and composition capabilities. However, whenwantsLayeris true, thedraw(_:)method is typically only called once to fully render its content into the layer's backing store, unlesslayer.needsDisplayOnBoundsChangeis set.
Event Handling and Responder Chain
NSView plays a critical role in handling user interactions. When a mouse click, key press, or gesture occurs, AppKit delivers these events to the appropriate NSView based on its location or current focus. This process is governed by the responder chain.
The responder chain is a linked list of objects (NSResponder) that are capable of responding to events. When an event occurs, it travels up the responder chain until an object handles it. For a view, the chain typically goes from the view itself, to its superview, then its superview's superview, up to the window, and eventually to the application object (NSApp).
You handle events by overriding specific methods in your NSView subclass:
mouseDown(with:),mouseUp(with:),mouseDragged(with:)for mouse interactions.keyDown(with:),keyUp(with:),flagsChanged(with:)for keyboard events.scrollWheel(with:)for trackpad/mouse scroll events.magnify(with:),rotate(with:)for trackpad gestures (requires enabling gestures).
When you override these methods, remember to call super if you want the event to continue propagating up the responder chain. If you fully handle the event and don't want other responders to process it, you can omit the super call. However, for many events, calling super is the correct behavior to ensure standard AppKit functionality continues.
Advanced NSView Topics: Layers, Transforms, and Coordinate Systems
NSView offers several advanced features for building sophisticated user interfaces:
-
Layer-backed Views (
wantsLayer = true): When you setwantsLayertotrue, yourNSViewis backed by aCALayerfrom Core Animation. This unlocks powerful capabilities like implicit animations, shadows, borders, corner radii, and 3D transformations for free. While Core Animation layers are designed for efficient composition and rendering, remember that drawing indraw(_:)only happens once to render the layer's content. For continuous or dynamic drawing, you might directly manipulate theCALayeror itscontentsproperty, or manually mark the layer as needing display. -
Coordinate Systems:
NSViewuses a flipped coordinate system by default, where (0,0) is at the bottom-left. However, manyNSViewsubclasses and text drawing operations internally use a non-flipped (top-left origin) system. You can queryisFlippedto determine a view's orientation. When mixingNSViewand Core Graphics/Core Animation, be mindful of these differences and use methods likeconvert(_:from:)and for transformations between coordinate spaces.
Mastering these advanced aspects of NSView will allow you to build truly custom, dynamic, and visually rich macOS applications that deliver a high-quality user experience consistent with the platform.
Common Interview Questions
What's the difference between `frame` and `bounds` for an NSView?
The `frame` of an `NSView` is its position and size relative to its *superview's* coordinate system. It describes where the view is located and how large it appears to its parent. The `bounds` of an `NSView`, on the other hand, describes its own internal content area, typically originating at `(0,0)` in its *own* coordinate system. When a view rotates or scales, its `bounds` may remain the same, but its `frame` changes to reflect its new position and size relative to its superview.
When should I use `setNeedsDisplay(_:)` versus just drawing immediately?
You should almost always use `setNeedsDisplay(_:)` (or `setNeedsDisplayIn(_:)`) rather than attempting to draw immediately. `setNeedsDisplay(_:)` tells the system that your view content is invalidated and needs to be redrawn. The system then coalesces these requests and performs the actual drawing efficiently during the next drawing cycle. Drawing immediately (which is generally not possible or recommended directly from your code, as drawing contexts are managed by AppKit) can lead to flickering, inefficient updates, and potential issues with the graphics pipeline. `setNeedsDisplay(_:)` ensures that your drawing is synchronized with the display refresh, resulting in smoother animations and a more responsive UI.
Can I use SwiftUI views inside an `NSView` hierarchy, and vice-versa?
Yes, you can bridge between SwiftUI and AppKit. In macOS (starting from macOS 10.15 Catalina), you can embed a SwiftUI view within an `NSView` hierarchy using `NSHostingView`. This allows you to integrate modern SwiftUI components into existing AppKit applications. Conversely, you can use `NSViewRepresentable` to wrap an `NSView` or its subclass and use it within a SwiftUI view hierarchy, enabling you to leverage custom AppKit views or legacy components in new SwiftUI-based applications. This interoperability is crucial for migrating and building hybrid applications.