Mastering the Responder Chain in iOS: Event Handling Demystified
The Responder Chain is a fundamental concept in UIKit, dictating how events like touch gestures, motion, and remote control events are delivered and processed within your iOS applications. Understanding it is crucial for building robust and interactive user interfaces. This article dives deep into its mechanics and practical applications.
What is the Responder Chain?
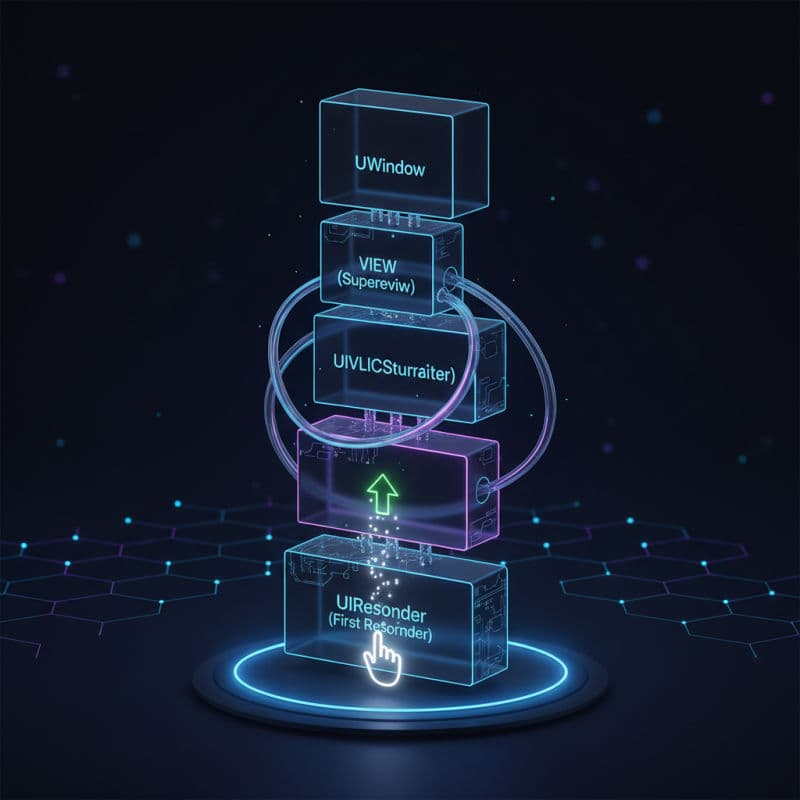
In UIKit, the Responder Chain is a series of linked responder objects that are given the opportunity to handle an event. When a user interacts with your app – perhaps by tapping a button, typing into a text field, or shaking the device – iOS needs a systematic way to deliver these events to the appropriate objects for processing. The Responder Chain provides exactly this mechanism.
Every object capable of responding to events in your app is a 'responder.' Key responder objects include UIView, UIViewController, UIWindow, UINavigationController, UITabBarController, and UIApplication. All these classes inherit from UIResponder, which provides the basic interface for event handling and participation in the Responder Chain.
When an event occurs, UIKit determines the 'first responder' – the initial object that is most appropriate to handle the event. For touch events, this is typically the deepest view in the view hierarchy under the touch. From there, if the first responder doesn't handle the event, it passes the event up the chain to its 'next responder.' This continues until an object handles the event or it reaches the UIApplication object (and eventually the app delegate), which is the last stop.
Understanding this flow is crucial for designing custom event handling, gesture recognizers, and even for managing keyboard input efficiently. The Responder Chain is a powerful mechanism that allows for highly flexible and contextual event processing without tightly coupling your view logic.
Anatomy of a Responder: The UIResponder Class
At the heart of the Responder Chain is the UIResponder class. It provides the core methods and properties that allow an object to become a responder, handle events, and pass events along the chain. Here are some of its key components:
func next -> UIResponder?: This read-only property is fundamental. It returns the next responder in the chain. You can override this property in your customUIRespondersubclasses to customize the event flow.func touchesBegan(_:with:),touchesMoved(_:with:),touchesEnded(_:with:),touchesCancelled(_:with:): These methods are used for handling touch events.func motionBegan(_:with:),motionEnded(_:with:),motionCancelled(_:with:): These methods are for handling motion events (like shaking the device).func pressesBegan(_:with:),pressesEnded(_:with:),pressesCancelled(_:with:): These are for handling physical press events (e.g., from a game controller or Apple TV remote).func canBecomeFirstResponder -> Bool: Returns a boolean indicating whether the receiver can become the first responder. By default, mostUIViewsubclasses returnfalse, but controls like and return .
When an event method is called on a responder, if that responder doesn't fully handle the event itself, it should call the superclass's implementation. If the superclass also doesn't handle it, it will eventually pass the event to next responder in the chain. Failing to call super can break the chain.
Tracing the Path: How Events Traverse the Chain
Let's trace how a typical touch event moves through the Responder Chain:
- Hit-testing and First Responder: When a touch occurs, UIKit performs a 'hit-test' on the view hierarchy to determine which view is at the touch location. The deepest view in the hierarchy at that point becomes the 'first responder' for that touch event.
- Event Delivery: The
touchesBegan(_:with:)method (ortouchesMoved,touchesEnded) is called on this first responder. - Propagation Up the Chain:
- If the first responder doesn't fully handle the event (e.g., its implementation of
touchesBegandoesn't consume the event entirely or explicitly callssuper), it passes the event up to itsnextresponder. - For a
UIView, itsnextresponder is typically its superview. If it's a root view of aUIViewController, itsnextresponder can be theUIViewControlleritself. - For a
UIViewController, itsnextresponder is often its view's superview, or if it's contained within a or , it might be that container controller.
- If the first responder doesn't fully handle the event (e.g., its implementation of
Here's a common example of nextResponder relationships:
View -> Superview -> Superview's Superview... -> ViewController -> NavigationController (if present) -> Window -> Application -> AppDelegate
iOS Compatibility Note: The fundamental Responder Chain mechanism has been a core part of UIKit since iOS 2.0 and remains consistent across all modern iOS versions.
Leveraging the Responder Chain for Custom Actions
Beyond simple event propagation, the Responder Chain is invaluable for implementing custom actions that can be triggered from various points in your app without needing direct references to the handler. This is achieved using the target-action mechanism and the canPerformAction(_:withSender:) method.
Imagine you want to implement a 'Share' action. Instead of having every view controller know how to share, you can pass the action up the Responder Chain until an object that can share is found. This decouples your views from specific action implementations.
Here's how it works:
- Define a Custom Action Method: Create a method in your responder object, e.g.,
shareContent(_ sender: Any?). - Declare Capability: Override
canPerformAction(_:withSender:)in yourUIRespondersubclasses. If an object can handle the action, returntruefor that action's selector. - Initiate the Action: Call
UIApplication.shared.sendAction(_:to:from:forEvent:)with aniltarget. This instructs UIKit to start looking for a responder in the chain that implementscanPerformActionfor that selector and then calls the action method on the first object that returnstrue.
This pattern is elegantly used by UIMenuController for 'Copy', 'Paste', 'Select' actions, and it's a powerful way to implement loosely coupled command patterns in your app.
Example Use Case: A 'Delete Item' action that could be initiated from a custom button on a UITableViewCell but handled by the UIViewController or even a parent UINavigationController.
Compatibility: The sendAction concept and canPerformAction have been integral to UIKit's responder architecture since iOS 2.0.
Becoming (and Resigning) the First Responder
The 'first responder' is a special status in the Responder Chain. It's the object that is currently receiving events, particularly keyboard input (for text fields and text views) and certain action messages. Only one object can be the first responder at a time.
canBecomeFirstResponder: You must override this property in your customUIRespondersubclass to returntrueif you want it to be able to become the first responder. By default,UIViewreturnsfalse.becomeFirstResponder(): Call this method on an object to ask it to become the first responder. If successful, UIKit will adjust the keyboard, menu controller, etc., accordingly. This method returnstrueif the object successfully became the first responder,falseotherwise.resignFirstResponder(): Call this method to tell an object to relinquish its first responder status. This is commonly used to dismiss the keyboard when a user is done typing. It also returnstrueon success.
Common Use Cases:
- Text Fields: When you tap a
UITextField, it automatically callsbecomeFirstResponder()to bring up the keyboard. - Custom Input Views: If you create a custom control that needs keyboard access or
UIMenuControllerinteraction, you'll need to manage its first responder status. - Dismissing Keyboard: Calling
view.endEditing(true)on a top-level view will traverse its subviews and ask any first responder toresignFirstResponder(), thus dismissing the keyboard.
Compatibility: becomeFirstResponder() and resignFirstResponder() have been cornerstone methods of UIResponder since iOS 2.0.
Conclusion: The Power of the Responder Chain in UIKit
The Responder Chain is a sophisticated and flexible event-handling mechanism that underpins much of UIKit's interactivity. By understanding how events propagate through your app's hierarchy of UIResponder objects, you gain powerful control over user interactions, custom commands, and keyboard management.
Embrace the Responder Chain for creating responsive, extensible, and maintainable iOS applications. Whether it's for simple touch event propagation or complex command routing, mastering this fundamental concept will significantly enhance your UIKit development skills.
Common Interview Questions
What is the primary difference between a Responder Chain and a Delegate Pattern for event handling?
The Responder Chain is an automatic, hierarchical system where events are passed up a chain of `UIResponder` objects until handled. It's often used for broad, system-level events (touches, motion) or loosely coupled custom actions. The Delegate Pattern, on the other hand, is a one-to-one or one-to-many relationship where a specific object (the 'delegate') is explicitly assigned to handle specific messages or events from another object. Delegates require direct assignment and are more suitable for focused, protocol-defined interactions.
How do Gesture Recognizers interact with the Responder Chain?
Gesture recognizers (subclasses of `UIGestureRecognizer`) typically intercept touch events *before* they are sent to the view's `touchesBegan(_:with:)` or similar methods. If a gesture recognizer successfully recognizes its gesture, it 'consumes' the touches, preventing them from being delivered further up the Responder Chain as raw touch events. However, the target-action methods called by the gesture recognizer can still indirectly initiate actions that use the Responder Chain (e.g., calling `sendAction:to:from:forEvent:` with a `nil` target).
Can I custom-route events through the Responder Chain?
Yes, you can. By overriding the `next` property in your `UIResponder` subclasses, you can define a custom `next` responder to divert the event flow from its default path. This allows for highly specialized event routing, enabling you to skip certain responders or direct events to specific handler objects that might not be in the direct superview/view controller hierarchy. However, be cautious when doing this, as it can make the event flow harder to debug if not well-documented and architected.